
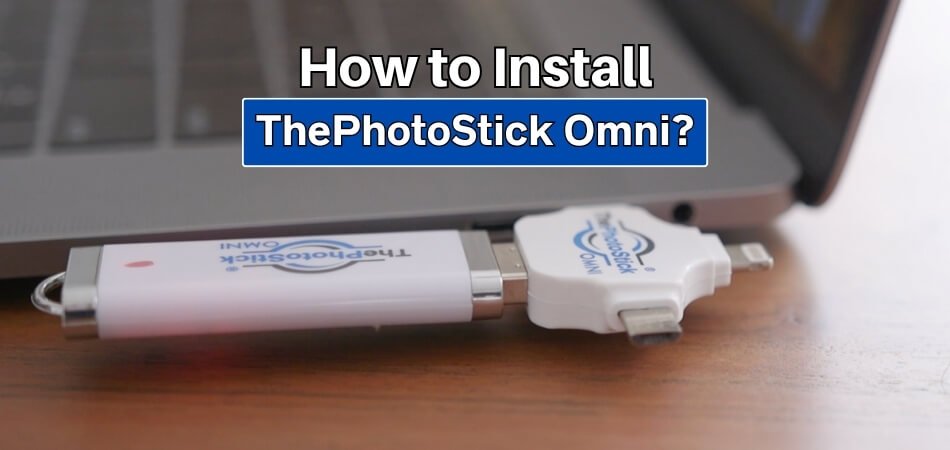
Storing old memories becomes even more special when you know they’re safe. Many people now use tools like ThePhotoStick Omni to back up their favorite photos and videos. It’s small, easy to use, and works on many types of devices. If you’re one of those wondering how to install ThePhotoStick Omni, you’re not alone.
To install ThePhotoStick Omni, download its official app, allow file access, connect the stick using the right adapter, and follow on-screen steps. For Android, use Google Play; for iOS, use the App Store. Start backup only after selecting the correct drive.
You’re probably thinking about how this whole thing works from start to finish. If you’ve ever wanted something that keeps all your photos and videos safe in one place, this is for you. This article shares everything you need to know in one simple place.
How to Install ThePhotoStick Omni?
Whether you use Android or iOS, setting up the ThePhotoStick Omni is easy. With just a few taps, you can protect your memories. The device backs up photos and videos quickly without a computer thanks to its companion app. Follow the instructions below for your device type to get started.
For Android Users
Setting up ThePhotoStick Omni on Android takes just a few simple steps. Follow this guide to get your backup started in minutes.
Download the App
Start by opening the Google Play Store on your Android phone or tablet. Search for “ThePhotoStick Omni” and install the official app. This app helps your device connect to the stick and manage file backups. Installing it ensures a smooth experience from the start. Always download the app from the Play Store to avoid fake or unofficial versions.
Allow Permissions
After installing, open the app and give it the necessary permissions. It will ask to access your photos, videos, and storage. These permissions are required so the app can find your files and back them up. Without allowing access, the stick won’t work properly. Tap “Allow” to move on with the setup.
Connect the Device
Use the correct adapter, either micro USB or Type-C, to plug in ThePhotoStick Omni. Make sure your device detects it immediately after connection. If your phone has a thick case, remove it temporarily for a better fit. You’ll see a notification or prompt when the device is recognized. If not, unplug and try again carefully.
Launch the App
Now, return to the app and tap on “Get Started.” Some Android devices may show a quick tutorial when you open the app again. Follow the on-screen steps to continue. The interface is user-friendly, so even beginners will find it simple. If the app closes unexpectedly, just relaunch it.
Select the Drive
Look for “Photostick” in the storage options shown on screen. Some Androids may list it as a “generic USB device.” Once selected, tap “Use This Folder” to allow file access. This tells the app where to save your photos and videos. After selecting the folder, you’re almost ready to begin.
Start the Backup
Finally, tap on “Connect” and wait for the backup to begin. The app will automatically start scanning and saving your photos and videos. You can let it run while you do other things on your phone. Progress will be shown in real-time on the screen. Don’t disconnect the stick until the backup finishes completely.
For iOS Users
Using ThePhotoStick Omni on iPhones and iPads is just as easy. If you’re unsure about its performance, you can read ThePhotoStick Omni review to see what others are saying before you begin. Follow these simple instructions to complete your setup without stress.
Download the App
Go to the App Store and search for “ThePhotoStick Omni.” Download and install the official app on your iPhone or iPad. It’s free and optimized for Apple devices. Make sure you’re connected to Wi-Fi for a smoother download. Using the official app ensures full compatibility with your device.
Give Access
Once installed, open the app and follow the prompt asking for access. You must allow permission to your photos, videos, and media for it to function. The app needs this access to detect which files can be backed up. Tap “Allow” when asked to proceed. Without it, the backup won’t begin.
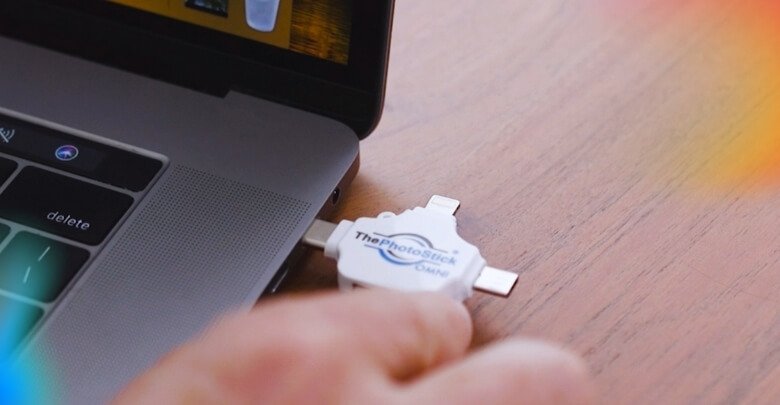
Insert the Stick
Plug ThePhotoStick Omni into your iPhone or iPad’s charging port. Depending on your model, you may need a Lightning adapter if it doesn’t fit directly. Remove your phone case if the connection feels loose. A notification may appear once the device is detected. Be sure it’s properly inserted before continuing.
Adjust Settings
When a prompt appears, tap “Settings” on your screen. Scroll to locate “Photostick” and select it as your backup drive. Tap “Done” once you’ve confirmed the selection. This step is important to allow the app to write files to the USB. Missing this step can cause the app to freeze.
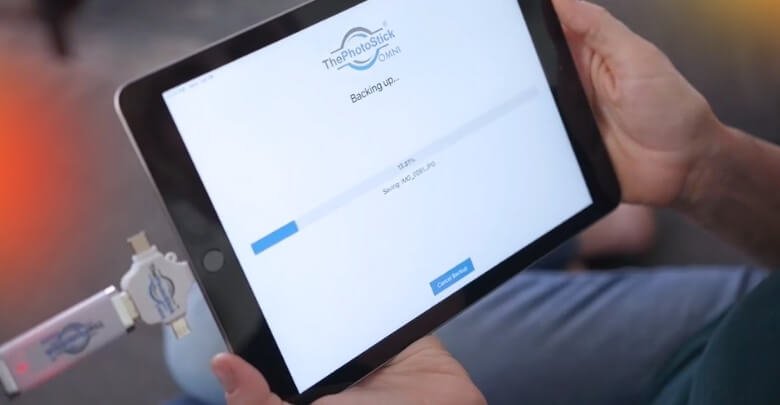
Launch the Backup
Reopen the app and follow the on-screen instructions. It will walk you through the next steps in a very simple layout. Most users will see a “Start Backup” option right away. Tap it to let the app begin processing your files. If it takes a moment to load, don’t worry—it’s normal.
Let It Run
The app will now begin saving your photos and videos onto the stick. This may take a few minutes, depending on how many files you have. Be patient and don’t remove the stick while it’s working. A progress bar will show how much is completed. Once done, you’ll see a confirmation on the screen.
Whether you’re using Android or iOS, these steps make installing ThePhotoStick Omni hassle-free. Always double-check compatibility and keep your app updated. With just a few simple actions, you can keep your important memories safe.
What Devices Are Compatible With ThePhotoStick Omni?
If you’re wondering whether your device will work with ThePhotoStick Omni, you’re not alone. This handy tool is designed to support a wide range of devices, making it easy to back up your memories no matter what you use.
| Platform | Supported OS Version |
| Windows | 7 SP1 and newer |
| macOS | 10.13 (High Sierra) and newer |
| iOS/iPadOS | 13.0 and newer |
| Android | 8.0 and newer |
Supported Connectors & Formats
- Comes with multi-adapter heads: USB-C, Micro-USB, and Lightning
- Capable of transferring photos, videos, and various files
- Read speed up to ~30 MB/s over Lightning
Thanks to its multi-platform support, ThePhotoStick Omni fits right into most digital setups, whether you’re using a computer or a phone. Just make sure your device meets the basic system requirements, and you’re all set.
How to Use ThePhotoStick Omni on a Windows or Mac Computer?
Backing up photos and videos might sound tricky, but ThePhotoStick Omni makes it simple. You don’t need any tech skills to use it. It works smoothly on both Windows and Mac computers. Just plug it in and follow a few easy steps. Let’s break it down so you can start using it right away.
Using ThePhotoStick Omni on a Windows Computer
If you’re using a Windows laptop or desktop, setting up ThePhotoStick Omni is quick and user-friendly. With just a few clicks, it scans your device and backs up your photos, videos, and other media files automatically—no software installation required. Follow the simple steps below to start your backup right away.
1. Plug In and Launch the App
Start by inserting ThePhotoStick Omni into any available USB port on your computer. In most cases, the software will auto-run. If it doesn’t, just open File Explorer, locate the device (usually labeled Photostick), and double-click the ThePhotoStick.exe file to launch the software.
2. Get Familiar with the Interface
Once launched, you’ll be greeted with a user-friendly dashboard that includes:
- Main Menu for easy navigation
- Status Area to view live updates during backup
- Capacity Chart showing available vs used space
- Options & Settings to customize how backups are handled
- Folder View for quick browsing
- Backup Stats to track real-time progress
- A dedicated “Photo/Video Organizer” that lets you sort and view saved files
Once installed, the software not only begins scanning for media but also helps to organize photos on PhotoStick Omni by sorting them into easy-to-navigate folders. This makes it much simpler to find your favorite pictures later.
3. Customize Your Backup Settings (Optional)
Click Options and Settings to adjust the backup process:
- Choose the types of files to include (e.g., photos, videos, music, documents)
- Enable the Skip Duplicates feature to save space
- Select your preferred folder structure and layout
4. Begin the Backup
Hit the Go button, and the software will automatically search for supported media formats such as JPEG, PNG, MP4, and AVI across your system. You don’t need to move or rename anything—just let it work in the background.
5. Monitor Progress
Watch the Status Area and Backup Stats to see which files are being processed, how many have been copied, and how much time remains. This transparent feedback ensures you always know what’s happening.
6. Wrap Up and Safely Eject
Once the backup is complete, a confirmation message will appear. You can verify saved content by browsing to E:\My_Files\ (or whatever drive letter is assigned), where your files are grouped neatly by device name. After that, close the app and safely eject the USB drive using Windows’ Safely Remove Hardware tool before unplugging.
Using ThePhotoStick Omni on a Mac Computer
Mac users can also enjoy a smooth experience with ThePhotoStick Omni. The device runs directly from the USB drive, scanning your Mac for photos, videos, documents, and more, while organizing everything in tidy folders without duplicates. Take a look at the steps below to get started in minutes.
1. Connect and Access the Drive
Plug ThePhotoStick Omni into an open USB port. A new volume—usually labeled Photostick—will show up on your desktop or in Finder’s sidebar.
2. Launch the Backup App
Open the Photostick drive and double-click the ThePhotoStick application. No need to install anything; it runs directly from the USB stick.
3. Start the Backup
Click the Go or Backup button in the app interface. ThePhotoStick Omni will begin scanning your Mac’s internal storage for compatible media, including photos, videos, audio files, and documents. It’s designed to skip duplicate files to avoid wasting space.
The software creates labeled folders based on device names, allowing you to quickly locate and manage your files anytime.
4. View Saved Files
After the backup finishes, you can browse files directly within the app using the Photo/Video Organizer, or manually go to Finder → Photostick → My Files.
5. Safely Eject the Drive
Once you’ve confirmed everything was backed up correctly, right-click the Photostick icon and select Eject. Wait for it to disappear from your screen before physically removing it from your Mac.
Using ThePhotoStick Omni is simple and doesn’t take much time. You don’t need to install anything or learn complicated steps. It works on both Windows and Mac without any problem. Just follow these steps, and your files will be backed up safely.
What to Do If Your Device Doesn’t Recognize ThePhotoStick Omni?
Tech can be tricky sometimes, especially when something doesn’t show up like it’s supposed to. If your device isn’t picking up ThePhotoStick Omni, don’t worry, it’s a common problem with a few easy fixes. Keep reading to learn what you can do and get your files backed up without stress.
- Check the Connection: Make sure the device is fully plugged in and that there’s no dust, dirt, or case blocking the charging or USB port.
- Use the Adapter First: Try inserting just the adapter into your phone or tablet before connecting the storage part of ThePhotoStick Omni.
- Unplug and Try Again: Take the device out, wait for five seconds, and plug it back in—it often helps your device find it again.
- Open the Right App: Some phones won’t show the stick unless you open a file app like “Files” on iPhone or “My Files” on Android.
- Say Yes to Permissions: Tap “Allow” or “Use This Folder” if your device asks—it’s how you give it permission to read the storage stick.
- Close and Reopen the App: Fully close the backup app you’re using, then open it again—it refreshes the connection and can help the stick appear.
- Restart Your Device: A simple restart can fix detection problems—turn your phone or computer off and then back on before trying again.
- Try a Different USB Port: On a computer, use another USB port if the first one doesn’t work—some ports get loose or stop working over time.
Sometimes the smallest things make the biggest difference when tech goes quiet. Trying these quick tips can save you time and stress. If it still doesn’t work, don’t give up—just double-check each step. One of them is likely to get your device to recognize ThePhotoStick Omni again.
How Long Does It Take to Complete a Backup with ThePhotoStick Omni?
Saving your photos and videos can sometimes feel like a long process. Many people don’t know what actually affects the backup speed. It’s not only about the size but also the device and port. Keep reading to learn what can make your backup faster or slower.
File Size and Type
Lots of small files can actually take more time than big ones. Each small photo needs extra steps like opening and closing, which add up. If you’re backing up thousands of small pictures, it’ll slow down the process. But big video files are written faster with fewer breaks in between. The time it takes depends on your file size and device speed, but for many users, the convenience and speed make it one of the more effective photo storage solutions for preserving important memories.
Device Compatibility
Different devices work at different speeds during the backup process. Newer phones with USB-C or updated Lightning ports transfer data more quickly. Older phones using Micro-USB often slow things down during transfers. Your device type can make a big difference in backup time. Even with a fast USB stick, a slow phone might delay things. So it helps to use newer gadgets for better speed and performance.
USB Port Version
Most people don’t realize their USB port can slow things down. Using USB 3.0 ports means faster speeds up to 30MB per second. But USB 2.0 ports may only go up to 20MB per second. That slower speed will affect how fast your files are saved. Even if your backup stick is fast, the port also needs to be. So using the right port will save you time and avoid long waits.
Time Examples
Every backup is different, but it helps to look at averages. A 10GB set of mixed files might take around eight to ten minutes. A 50GB backup may need 35 to 45 minutes to finish up. If you’re saving 100GB, expect it to take over an hour. These times include steps like organizing and skipping duplicate files. So while it may seem slow, the tool is doing important work in the background.
What to Expect
It’s totally normal for backups to take longer sometimes. This tool checks and sorts files to keep everything neat and simple. It’s not just copying—it’s also organizing while it works. That extra care adds a little more time to the process. But in the end, you’ll have clean, sorted files without doing extra work. And that makes the whole process easier for everyone using it.
Backup speed depends on file sizes, device type, and USB ports. Always check your connection before starting to save your important memories. The tool works best when used with newer devices and ports. Knowing what affects backup time helps make everything feel much easier.
FAQs About How to Install ThePhotoStick Omni?
If you’re still a little unsure about some parts of installing ThePhotoStick Omni, you’re not alone. Many users have similar questions, especially when trying it for the first time. Below are some frequently asked questions with easy answers to help you install and use the device confidently.
Is the ThePhotoStick Omni App Free to Download and Use?
Yes, the app is free to download and use on both Android and iOS devices. You can find it on Google Play and the Apple App Store without charge. There are no hidden fees or in-app charges for the app. There is only one cost involved, buying the physical device, the ThePhotoStick Omni. With the stick, you can back up, organize, and restore your files anytime using the free app.
Does ThePhotoStick Omni Need Internet to Work?
No, ThePhotoStick Omni does not need an internet connection to back up your files. It works completely offline, using your phone or computer’s storage system. You just plug it in, follow the steps, and it does the backup. This makes it great for areas with slow or no internet.
Can I Use ThePhotoStick Omni on More Than One Device?
Yes, you can use ThePhotoStick Omni on multiple devices. For example, you can back up files from your phone, then plug it into your laptop and back up files from there too. It keeps the folders separate so files don’t mix. Just make sure you give each backup enough time to finish.
Do I Have to Install the App Every Time I Use It?
No, you only need to install the app once on each device. After it’s installed, you can just open it and start your backup without downloading it again. If the app asks for an update, go to the app store to update it. Keeping the app updated helps it work smoothly.
Can I Choose Which Photos or Videos to Back Up?
Yes, ThePhotoStick Omni app allows you to select specific files. You don’t have to back up everything at once. You can go through your folders and choose what you want saved. This helps save space and keeps your storage more organized.
What Happens If I Remove the Stick During Backup?
If you remove the stick during a backup, it might stop the process and not save all your files. It’s best to wait until the backup is fully done before unplugging. If you unplug it too early, you might need to start the process again. Always look for the “complete” message before removing it.
Can I Delete Files From ThePhotoStick Omni After Backup?
Yes, you can delete files from the stick if you want to free up space. Just plug it into a computer, open the folders, and delete what you no longer need. Be careful not to delete important files by mistake. It’s a good idea to double-check before erasing anything.
Will My Files Stay Safe on ThePhotoStick Omni?
Yes, your files are safe as long as you store the stick properly. Like any USB drive, it can be damaged if dropped or exposed to water. Keep it in a safe, dry place when not in use. Also, don’t remove it while files are still being copied.
Can I Back Up New Files Without Erasing Old Ones?
Yes, you can add new files anytime without deleting the old ones. ThePhotoStick Omni is smart—it looks for new photos and videos only. This means you don’t have to worry about losing your earlier backups. It just adds what’s new and skips what’s already saved.
Does ThePhotoStick Omni Work with Tablets?
Yes, it works with most tablets that support USB OTG (On-The-Go). You’ll need to use the correct adapter, just like you would for a phone. Make sure your tablet meets the system requirements. Once connected, the app works the same way as on a phone.
End Note
Backing up your photos doesn’t have to be confusing or time-consuming. Now that you’ve learned the simple steps for both Android and iOS, you’ve got everything needed to protect your files. So if you were wondering how to install ThePhotoStick Omni, the answer is: download the app, plug in the device, and follow a few easy prompts.
Before starting your backup, check your USB adapter and give the app permissions. Try to keep the app updated, and always use official downloads. Stay organized, follow each step, and enjoy the peace of mind that comes with safe storage. Wishing you smooth backups and happy photo-keeping!


