
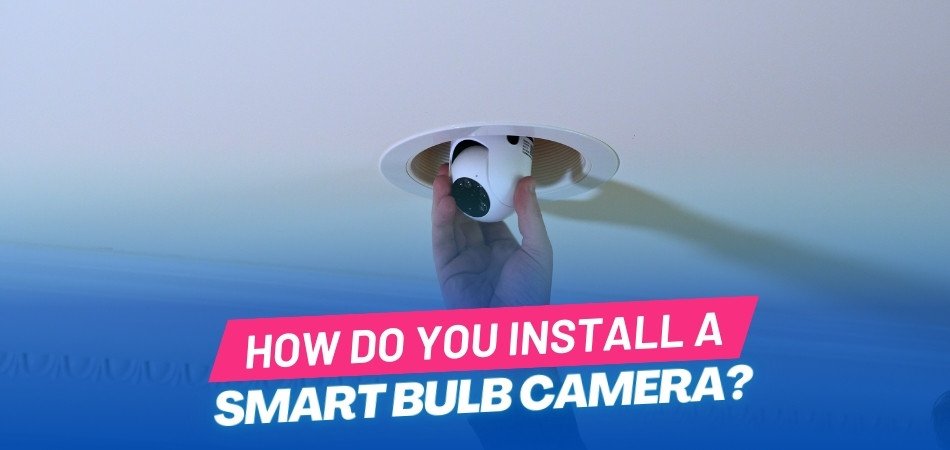
A smart bulb camera is a versatile and innovative security solution that combines a camera and a light bulb in one device. This all-in-one gadget offers a seamless way to monitor your home without the need for additional equipment. Now the question is, how do you install a smart bulb camera?
The process to install a smart bulb camera is simple and straightforward. First, turn off the power to the light switch, then screw the camera bulb into a standard light socket. After that, download and install the required app, create an account, and follow the app’s instructions to connect the camera to your Wi-Fi network. It’s that easy!
Keep reading to learn more about setting up and maximizing the benefits of your smart bulb camera.
How Do You Install a Smart Bulb Camera? Step-by-Step Guide for Easy Setup
Smart bulb cameras are an innovative way to enhance home security without bulky equipment. These devices function as both a light source and a surveillance camera. Let’s dive into how you can easily set up your smart bulb camera at home.
Know Your Smart Bulb Camera’s Features
Smart bulb cameras come with various features for security and convenience. Some models offer motion detection and night vision capabilities. You may also find two-way audio for real-time communication. Exploring these features can help you make the most of your device.
Prepare for Installation
Before you begin, gather all necessary equipment, including the smart bulb camera and your smartphone. Make sure the light socket is compatible with the camera bulb. Turn off the power at the light switch to ensure safety. Carefully read the manufacturer’s instructions to avoid setup issues.
Install the Smart Bulb Camera
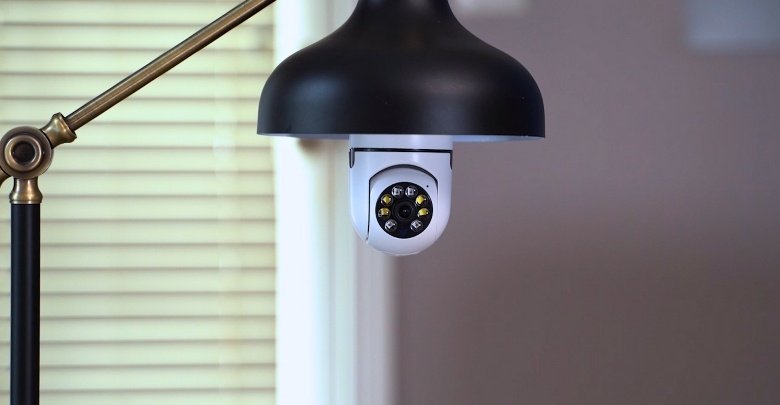
Screw the smart bulb camera into a standard light socket securely. Double-check that the bulb is firmly in place to avoid flickering. Turn the power back on and wait for the device to activate. You may notice a blinking light indicating it’s ready for pairing.
Download and Set Up the App
Search for the recommended app in your device’s app store. Download and install it, then open the app to begin setup. Create an account using your email and follow the on-screen prompts. Allow necessary permissions for the app to function properly.
Connect to Wi-Fi and Pair the Device
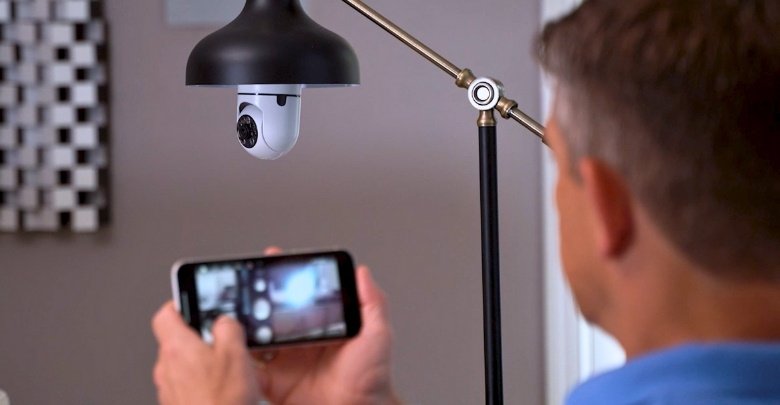
Make sure your phone is connected to a stable Wi-Fi network. Open the app and select the option to add a new device. Follow the instructions to connect the smart bulb camera to your Wi-Fi. Once paired, test the camera to ensure it’s functioning.
Test and Adjust Settings
After installation, check the camera feed for clear visuals and audio. Adjust the angle of the bulb for optimal coverage. Customize settings within the app for motion alerts and video quality. Test the two-way audio to verify smooth communication, especially if you’re using a reliable model like Sight Bulb for enhanced performance.
What Factors Should You Consider Before Installing a Smart Bulb Camera?
Installing a smart bulb camera can significantly enhance your home’s security and convenience. However, proper planning is essential to ensure smooth operation. Let’s explore the important factors to consider before installing one.
Compatibility with Existing Fixtures
Ensure the smart bulb camera fits the socket type you plan to use. Some models only work with standard E26 or E27 sockets. Double-check compatibility to avoid unnecessary hassle during installation. Read the product specifications before purchasing to confirm suitability.
Wi-Fi Signal Strength
A reliable Wi-Fi connection is crucial for your smart bulb camera to function effectively. Weak signals can cause buffering or disconnection issues. Test your Wi-Fi strength near the installation area beforehand. Consider using Wi-Fi extenders if the signal is weak.
App Compatibility and Features
Ensure the app required for the smart bulb camera is compatible with your smartphone. Check if the app supports your phone’s operating system. Explore the app’s features, like live view, motion alerts, and two-way audio. Knowing the app’s functions helps optimize your smart bulb camera experience.
Privacy and Security Concerns
Smart bulb cameras connect to your home network, so privacy should be a priority. Make sure the camera offers secure encryption for data protection. Regularly update firmware to prevent potential security breaches. Review the manufacturer’s privacy policies for peace of mind.
Camera Resolution and Night Vision
The camera’s resolution affects the clarity of the footage captured by your device. Opt for models with HD or higher resolution for crisp visuals. Night vision capabilities are essential for monitoring low-light areas effectively. Consider models with infrared or color night vision for better performance.
Budget and Long-Term Costs
Consider the initial cost of the smart bulb camera and any additional expenses. When evaluating the value of security cameras, be sure to include potential subscription fees for cloud storage. Over time, keep in mind maintenance costs and upgrades too. Ensure that your choice aligns with your budget and security needs.
How to Ensure Your Smart Bulb Camera Is Powered On Properly?
Ensuring your smart bulb camera is powered on properly is essential for reliable performance. Simple mistakes during setup can cause frustrating issues later. Follow these steps to make sure your device stays powered and ready to use.
Confirm Proper Installation
Check if the smart bulb camera is securely screwed into the socket. Loose connections can cause power interruptions or flickering. Make sure the socket supports the wattage requirements of your camera. Double-check the manufacturer’s guidelines for installation compatibility.
Verify Power Source Compatibility
Ensure your power source is compatible with the smart bulb camera’s requirements. Standard E26 or E27 sockets work for most models. Using incompatible sockets can result in malfunction or complete power failure. Consult the user manual to confirm power source compatibility.
Test the Light Switch Functionality
Turn the light switch on to provide power to the smart bulb camera. Some models require constant power to operate effectively. Avoid turning off the switch to prevent connectivity issues. If needed, use a smart switch to maintain consistent power.
Inspect Wi-Fi Connectivity
Wi-Fi connectivity is crucial for powering your smart bulb camera’s functionalities. Without proper connection, your device may not operate effectively. Ensure your router is within range of the camera’s installation point. Weak signals can interfere with performance and cause disconnections.
Check for Firmware Updates
Outdated firmware can cause performance issues with your smart bulb camera. Regularly update the firmware through the official app for optimal results. Keeping the firmware updated ensures compatibility with newer features. It also helps fix bugs that may affect the power connection.
Monitor for Consistent Power Supply
Ensure the power supply remains stable and uninterrupted for reliable performance. Fluctuating power can cause the camera to malfunction or restart. If issues persist, consider using a surge protector for added security. Monitor the device periodically to confirm it’s receiving constant power.
What to Do If Your Smart Bulb Camera Isn’t Connecting to Wi-Fi?
A smart bulb camera offers convenience and enhanced security, but connection issues can be frustrating. If your device isn’t connecting to Wi-Fi, there are several steps you can take. Follow this guide to troubleshoot and resolve connectivity problems effectively.
Check Your Wi-Fi Signal Strength
Weak Wi-Fi signals can prevent your smart bulb camera from connecting properly. Ensure your router is within range of the device. Walls and obstacles can weaken the signal, affecting connectivity. Consider using a Wi-Fi extender to boost signal strength if needed.
Confirm Network Compatibility
Many smart bulb cameras work only with 2.4GHz networks, not 5GHz. Check your router settings to confirm it’s broadcasting a 2.4GHz signal. Some dual-band routers allow you to split networks manually. While using bulb cameras without WiFi is possible in limited offline modes, full features usually require proper network compatibility.
Restart Your Router and Camera
Restarting devices can resolve temporary connectivity issues quickly. Turn off your router and wait for 30 seconds before rebooting. Disconnect and reconnect your smart bulb camera to the power source. Allow sufficient time for devices to reconnect to the network.
Update Firmware and App
Outdated firmware or apps can cause connectivity issues. Ensure your smart bulb camera’s firmware is up-to-date through the official app. Regularly updating the app ensures compatibility with newer network standards. Firmware updates often resolve bugs affecting Wi-Fi connectivity.
Re-enter Wi-Fi Credentials
Incorrect Wi-Fi credentials can prevent your camera from connecting. Double-check the network name and password during the setup process. Re-enter the credentials to ensure accuracy and proper connection. Consider resetting the device if issues persist.
Reset Your Smart Bulb Camera
If all else fails, perform a factory reset. Locate the reset button (usually on the base), press and hold it for 10–15 seconds until the light blinks. This clears previous settings. After resetting, open the app and follow the initial setup process again to reconnect your camera to Wi-Fi.
Best Way to Maintain Your Smart Bulb Camera for Long-Term Use
Maintaining your smart bulb camera properly ensures it functions effectively for years to come. Regular care helps prevent unexpected issues and boosts performance. Here are some practical tips to keep your device in top shape.
Clean the Camera Lens Regularly
Dust and debris can accumulate on the camera lens, affecting image clarity. Use a microfiber cloth to clean the lens gently. Avoid using harsh chemicals that may damage the lens coating. Regular cleaning ensures clear visuals and uninterrupted monitoring.
Keep Firmware and Apps Updated
Firmware updates improve compatibility and fix bugs that may affect performance. Regularly check for updates through the official app. Installing the latest updates enhances functionality and security features. Keeping apps updated also improves connectivity and usability.
Monitor Wi-Fi Signal Strength
Stable Wi-Fi is crucial for reliable smart bulb camera performance. Weak signals can cause buffering, delays, or disconnection. Regularly check your Wi-Fi signal strength near the camera location. Consider using extenders or repositioning your router for better coverage.
Inspect Power Connections Frequently
Ensure your smart bulb camera remains securely connected to its power source. Loose connections can cause flickering or complete power loss. Regularly inspect sockets and wiring for damage or signs of wear. Keeping connections secure improves performance and device lifespan.
Adjust Camera Settings Appropriately
Tailor your camera’s settings according to your specific needs and environment. Adjust motion detection sensitivity for optimal performance without false alerts. Periodically review settings to match changes in your home’s layout or lighting. Proper adjustments enhance accuracy and energy efficiency.
Perform Regular Device Resets
Occasionally, reset your smart bulb camera to clear cache and refresh its performance. Regular resets can prevent minor glitches from escalating. Follow the manufacturer’s guidelines for resetting the device properly. Resetting can also enhance connectivity and performance consistency.
FAQs
If you’re looking for answers to some common questions about installing a smart bulb camera, you’re in the right place. These FAQs provide detailed insights to help guide you through the setup and troubleshooting process, ensuring your smart bulb camera works smoothly.
Can You Install A Smart Bulb Camera Outdoors?
Yes, you can install a smart bulb camera outdoors, but it’s essential to ensure it is designed for outdoor use. Outdoor smart bulb cameras are weatherproof and can withstand rain, dust, and extreme temperatures. Always check the manufacturer’s guidelines to confirm suitability for outdoor environments.
Do Smart Bulb Cameras Work During Power Outages?
Smart bulb cameras will not work during power outages unless they are connected to a backup power source. Using an uninterruptible power supply (UPS) or battery backup can help keep your camera operational. Without power, the device cannot connect to Wi-Fi or record footage.
How Can You Improve Motion Detection Accuracy?
Improving motion detection accuracy involves adjusting sensitivity settings and ensuring the camera’s field of view is unobstructed. Positioning the camera at the appropriate height and angle also enhances detection accuracy. Regularly updating the firmware ensures optimal performance of motion detection features.
Are Smart Bulb Cameras Compatible With Smart Home Systems?
Many smart bulb cameras are compatible with popular smart home systems like Alexa, Google Home, and Apple HomeKit. Compatibility allows you to control your device using voice commands or through integrated smart home apps. Always verify compatibility before purchasing for seamless integration.
What Should You Do If Your Camera Overheats?
If your smart bulb camera overheats, immediately turn it off and let it cool down. Overheating can occur due to prolonged use or high ambient temperatures. Ensure proper ventilation and avoid installing the camera in direct sunlight. Regularly monitoring temperature levels can prevent damage.
Can You View Footage From Your Smart Bulb Camera Remotely?
Yes, you can view footage remotely if your smart bulb camera is connected to a stable Wi-Fi network. Most cameras provide live-streaming options through dedicated apps accessible from smartphones or tablets. Ensure your app is updated for reliable remote access and viewing.
How Often Should You Reset Your Smart Bulb Camera?
Regularly resetting your smart bulb camera can help refresh its performance and resolve minor glitches. A monthly reset is generally recommended, but you can reset it more frequently if issues persist. Always follow the manufacturer’s guidelines for proper reset procedures.
Bottom Line
Installing a smart bulb camera is straightforward when you follow the right steps and precautions. Understanding how do you install a smart bulb camera? involves checking compatibility, ensuring proper installation, and configuring the device through the recommended app. Maintaining a stable Wi-Fi connection, regularly updating firmware, and cleaning the camera lens contribute to optimal performance.
Addressing connectivity issues promptly and ensuring consistent power supply are also essential for reliable operation. Evaluating the value of security cameras helps you make informed decisions about features and budget. With proper setup and maintenance, your smart bulb camera will provide enhanced security and convenience. Following these steps ensures your device functions effectively, providing long-term safety and peace of mind.


