
Photos on your iPhone hold special memories. But your phone can run out of space fast. That’s why it’s important to save your photos in a safe place. There are a few easy ways to do this.
So, what is the best way to store photos from iPhone?
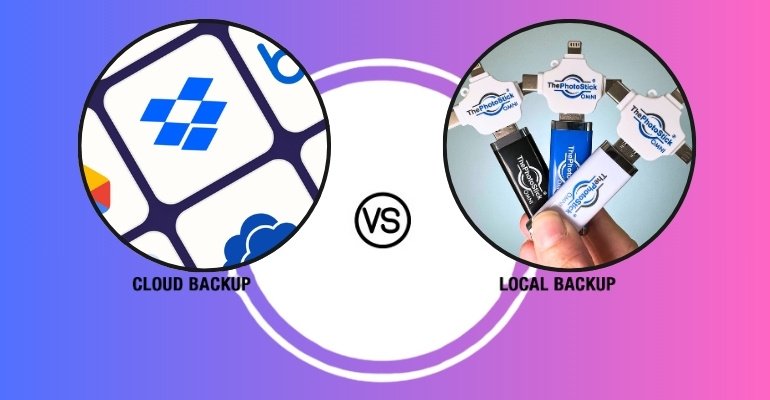
The best way is to use iCloud Photos, local backups to your computer or a drive, or apps like the Photostick Omni and Google Drive. iCloud is easy and automatic, but gives only a little free space. Backups on your computer or drive give you full control. Cloud apps help you share and use your photos on any device.
Keep reading to learn which option is best for you.
What is the Best Way to Store Photos From iPhone?
Photos on your iPhone hold moments you don’t want to lose. But iPhones fill up fast and need backup. Let’s look at the best ways to keep your photos safe and easy to access.

Use iCloud Photos (Apple’s Built-in Option)
- iCloud Photos syncs your pictures across all your Apple devices without you doing anything. It saves full-resolution files safely in the cloud.
- You can turn on “Optimize Storage” to free space on your iPhone while still keeping your photos. The full photos stay in iCloud, and your phone only keeps previews.
- You can check your photo library on any Apple device signed in with the same account. It works smoothly with iPhones, iPads, and Macs.
- The free plan gives you only 5GB, which may fill up quickly. You might need to upgrade to store more photos.
Save Photos to a Computer or External Drive
- Moving photos to your computer with a USB cable gives you full control over your files. It keeps everything private and offline.
- Using Apple Photos or Microsoft Photos makes this process simple and easy to manage. These apps help organize your albums and folders.
- On a Mac, you can send photos using AirDrop if you want a wireless transfer. This is fast and doesn’t need the internet.
- An external hard drive gives lots of space without monthly costs. It’s also good for making a second backup copy.
Use Third-Party Cloud Services
- Google Drive, Dropbox, and OneDrive work on all types of devices, not just iPhones. You can access them from your computer, phone, or tablet.
- These apps make it easy to share pictures with others by sending album links. You can also leave comments and sort albums.
- The free storage limit is often more than iCloud’s, which helps if you take a lot of photos. You can upgrade if needed.
- If you’re using extra tools like ThePhotostick Omni, it adds another way to back up your files easily. It works well with cloud apps and helps organize your backups.
Mixed Methods for Better Safety
- Relying on one method may not protect your photos in every situation. Combining two or more keeps your photos extra safe.
- Use iCloud for daily backups and a drive for full photo libraries. This gives access and control at the same time.
- Third-party apps are great for sharing and organizing albums by event or date. They also let you store files without using iPhone space.
- It’s easy to forget to back up often, so set a weekly reminder. That way, nothing gets lost over time.
Is iCloud Photos the Most Secure Way to Store iPhone Photos?
Yes, iCloud Photos is the most secure way to store your iPhone photos for most users. Apple uses strong encryption, and you can turn on extra security with Advanced Data Protection. Your photos get encrypted with a special key that stays only on your device, so even Apple cannot see them. This high level of security protects your pictures from hackers, data leaks, or unwanted access, but some users may want even stricter control. Take a look at how iCloud Photos secures your images.

End-to-End Encryption
Turning on Advanced Data Protection adds end-to-end encryption to your photo library. Your pictures are locked with a key kept only on your device. No one, not even Apple, can view or access your photos without this key. This gives you peace of mind about your privacy.
Secure Transmission
Apple uses strong encryption for sending your photos between your device and the cloud. Photos use AES-128 and SHA-256 protocols during this process. The data stays secure both while moving and while stored. Hackers cannot easily intercept or decode your files in transit.
Protection at Rest
Photos in iCloud are protected by powerful encryption methods even while stored. Apple keeps your files safe on its servers using secure tokens. Two-factor authentication adds another layer of safety for your account. Only you can open your photo library on trusted devices.
Access Across Devices
You can see your photos on any device signed in with your Apple ID. Each device must go through strict authentication before access is allowed. If someone tries to sign in without permission, Apple blocks the attempt. This limits who can see your pictures.
Risks and Considerations
Even with all these protections, no cloud system is completely risk-free. Very cautious users sometimes prefer local storage for total privacy. Local drives don’t need the internet, but you can lose your photos if your device is damaged. Some people look for an alternative to iCloud for storing photos if they want different features or more control.
Convenience vs. Privacy
iCloud Photos is secure but also simple to use for everyday needs. It gives you a good balance between safety and ease. Local storage increases privacy but takes away instant access and backup. Your choice depends on how much you value convenience or privacy.
How to Use ThePhotostick Omni to Store Photos From iPhone?
Saving your iPhone photos doesn’t have to be hard or time-consuming. ThePhotoStick Omni makes it fast and stress-free. Follow these simple steps to back up your photos and keep them safe forever.
Install ThePhotoStick Omni App
- Open the App Store and search for “ThePhotoStick Omni” in the search bar. Tap the “Get” button to install the app.
- Installation takes just a few moments, depending on your internet speed. Make sure the download finishes before opening it.
Allow App Permissions
- Launch the app and allow access when the permission message appears on your screen. This includes access to photos and videos.
- You can also let the app access your music if needed. Granting full permission ensures a smooth backup without issues later.
Connect ThePhotoStick Omni to Your iPhone
- Plug the device into your iPhone using the included adapter that matches your phone’s port type.
- Remove any bulky case that might block the device from connecting properly. Wait for your phone to detect it.
- If your phone doesn’t recognize the stick, unplug it and try again. You can also restart the app if needed.
Start Setup in the App
- To begin the backup setup process, tap the blue “GET STARTED” button in the app.
- Read the backup tips carefully and tap “NEXT” to continue with the steps.
- Watch the tutorial video if you’d like extra help, then move forward by tapping “NEXT” again.
- When ready, tap “Connect” to link the app to the storage drive.
Access and Choose the Drive
- Tap “Browse” at the bottom right to see connected drives listed in the app.
- Look for the one named “PHOTOSTICK” or a generic USB name and select it from the list.
- Tap “Open” in the top-right corner to view and manage files within that drive.
Begin the Backup Process
- Tap “Backup Files Now” on the main screen to start saving your photos and videos.
- Pick “Backup All Photos and Videos” to save everything, or “Select to Backup” for custom selections.
- Tap “Backup Now!” to launch the backup. The app will show a summary when it finishes.
- Once done, you can organize photos on Photostick Omni through the file view for better access later.
Free Up iPhone Storage (Optional)
- You can choose to delete files from your phone once they’ve been backed up to free up space.
- The deleted files first go to the “Recently Deleted” album in your Photos app.
- To clear up actual space, open that album and permanently delete those files from there.
- This step helps you avoid storage warnings and lets your iPhone run more smoothly.
Helpful Reminders and Tips
- Always check that the app is installed and allowed full access before using the backup tool.
- If something isn’t working, try unplugging the stick or closing and reopening the app.
- For extra help, go to the app’s Support section and watch the tutorial video again.
- Using the tool often helps keep your photos safe and your iPhone space clean.
How Do I Choose Between Cloud Storage and External Drives for Backups?
| Factor | Cloud Storage | External Drives |
| Convenience | High (remote access) | Low (physical access only) |
| Security | Depends on provider | High (offline, physical) |
| Cost | Subscription-based | One-time purchase |
| Accessibility | Anywhere with internet | Only where the drive is present |
| Maintenance | Provider-managed | User-managed (replace/backup) |
| Risk | Provider breach, hacking | Loss, theft, hardware failure |
Choosing between cloud storage and external drives depends on your priorities for convenience, security, cost, and accessibility. Here’s a breakdown to help you decide:
Cloud Storage
Pros:
- Highly convenient—access your photos from anywhere with an internet connection.
- Expandable storage, easy file sharing, and automatic backups.
- Built-in encryption with reputable providers and features like two-factor authentication.
- Great for collaboration and syncing across multiple devices.
Cons:
- Requires ongoing subscription fees for large storage needs.
- Dependent on internet connectivity for access and uploads.
- Security relies on the provider’s infrastructure; some services have had privacy issues or data breaches in the past.
External Drives
Pros:
- One-time purchase with no recurring fees.
- Full control over your data—no third-party access.
- Not reliant on internet connectivity; perfect for offline access and backup.
- Offers the highest level of privacy, as your files remain physically with you.
Cons:
- Physical devices can be lost, stolen, or damaged, resulting in data loss.
- Requires manual backups and maintenance.
- Drives need to be replaced every few years due to potential hardware failure.
Security Considerations
- Cloud storage with client-side encryption can offer privacy comparable to external drives, as only you can decrypt your data.
- External drives are safest from online threats but vulnerable to physical risks (loss, theft, failure).
Cost
- Cloud storages are subscription-based (monthly/annual), but some offer lifetime plans. More cost-effective for short-term or scalable needs.
- External drives have a higher upfront cost, but no ongoing fees. Long-term, it can be cheaper if you don’t need to expand storage often.
Most experts recommend using both: cloud storage for convenience and accessibility, and external drives for secure offline backups. This dual approach minimizes the risk of data loss and maximizes accessibility.
What Are the Risks of Relying Solely on Local Backups Versus Cloud Options?
Choosing only local backups or only cloud backups each introduces unique risks to your photo (or data) protection strategy. Understanding these risks is essential for making an informed decision.
Risks of Relying Solely on Local Backups
- Physical Vulnerability: Local drives (external disks, hard drives, USBs) are susceptible to physical threats such as theft, fire, flooding, or accidental damage. If your backup device is lost, stolen, or destroyed, your data may be gone forever.
- Limited Accessibility: As local backups can only be accessed on the device itself, remotely regaining access to photos is difficult.
- Manual Processes and Human Error: Local backups often require manual setup and regular maintenance. Users can forget to run backups or make mistakes in the process, increasing the risk of incomplete or outdated backups.
- Limited Scalability: As your photo library grows, you may need to purchase additional hardware, which can become costly and cumbersome.
- Hardware Failure: Hard drives and other storage devices have a finite lifespan and can fail unexpectedly, potentially resulting in total data loss if there is no secondary backup.
- No Offsite Protection: If all backups are kept in the same physical location as the originals, a single disaster (fire, flood, burglary) can wipe out both original and backup copies.
Risks of Relying Solely on Cloud Backups
- Internet Dependency: Cloud backups require a stable internet connection for both uploading and restoring data. In areas with unreliable or slow internet, this can delay access to your photos.
- Ongoing Costs: Cloud services typically charge recurring subscription fees, which can add up over time, especially for large photo libraries.
- Data Security and Privacy: Storing data with a third-party provider introduces potential privacy concerns and risks of data breaches, even though reputable providers use strong security measures.
- Limited Control: You have less direct control over your data and backup schedules, and are dependent on the provider’s infrastructure and policies.
FAQs About the Best Way to Store Photos From iPhone
iPhone photos capture your best memories, but running out of space or losing them is a real concern. Choosing the right storage method helps keep them safe and easy to access. Below are ten helpful FAQs with clear answers.
Can I Store iPhone Photos on a Flash Drive Without a Computer?
Yes, you can use iPhone-compatible flash drives like ThePhotoStick Omni or SanDisk iXpand. These connect directly to your phone using a Lightning or USB-C port and store photos without needing a computer or internet connection.
How Often Should I Back Up My iPhone Photos?
It’s best to back up your photos weekly or after important events. Regular backups reduce the risk of losing new photos due to phone damage, accidental deletion, or system issues, giving peace of mind and secure storage.
Do Photos Lose Quality When Stored on Cloud Services?
Most cloud services store photos in original quality unless you change settings. Some services offer compressed versions to save space, so check your settings to ensure full-resolution backups if image quality is important to you.
Are There Free Alternatives to iCloud for Storing iPhone Photos?
Yes, apps like Google Photos, Dropbox, and OneDrive offer free cloud storage with limited space. These services are easy to use and allow access from different devices, making them great low-cost options for photo storage.
Is It Safe to Store iPhone Photos on My Computer?
Storing photos on your computer is safe if you use antivirus software and regularly back up your data. Local storage keeps files offline, away from hacking risks, and gives full control over your photo collection.
What File Formats Are iPhone Photos Saved in?
iPhones save photos mainly in HEIC format, which is efficient but not always compatible with all platforms. You can change your settings to save photos as JPEGs if needed, especially when storing them on non-Apple devices.
Can I Automatically Back Up Photos Without iCloud?
Yes, apps like Google Photos and Amazon Photos allow automatic backups without using iCloud. Just install the app, sign in, and enable auto-backup in settings to start saving your photos automatically to the cloud.
Do External Hard Drives Work With iPhones?
Yes, some external hard drives work directly with iPhones using an adapter or special app. You can move your photos off your phone and keep them backed up without relying on cloud services or computer transfers.
What Happens If I Delete a Photo After Backup?
If the photo has been properly backed up to another device or cloud service, deleting it from your iPhone won’t affect the copy. Just make sure the backup was successful before deleting, to avoid losing the file.
How Can I Manage Duplicate Photos in My Backups?
Use backup tools or apps with duplicate detection features to skip or remove repeated photos. This helps save storage space and keeps your photo library clean and well-organized without needing to manually sort everything yourself.
Closing Remarks
Backing up your iPhone photos is very important. If you skip steps or make mistakes, you could lose your pictures. To avoid this, learn what is the best way to store photos from iPhone. Use iCloud, an external drive, or both to stay safe.
Follow each step in the backup process the right way. If something goes wrong, fix it as soon as you can. Errors can cause stress or lost files. Keeping your photos safe doesn’t have to be hard. Just take your time and follow the right steps. That way, your memories stay safe and easy to find.


