
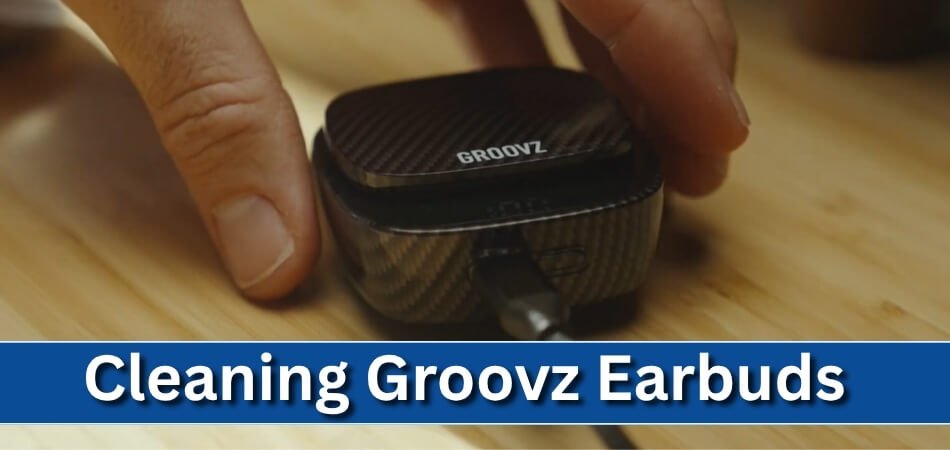
Your Groovz earbuds go everywhere with you, from workouts to calls and daily commutes. Over time, sweat, dust, and pocket lint quietly build up, affecting comfort and performance. If you have ever wondered, “How do I clean Groovz earbuds?” You are not alone, and the answer is simpler than most people think.
Cleaning them involves removing the silicone tips, wiping the surface gently, brushing the speaker mesh, disinfecting carefully, and drying everything fully before reassembly. This easy routine protects sound clarity and durability. Continue reading to learn each step in detail and keep your earbuds performing like new.
Signs Your Groovz Earbuds Need a Deep Clean
Many people use their Groovz earbuds daily without realizing how quickly dirt and residue can build up. A deep clean helps maintain sound quality and extends the life of your earbuds. Here are simple signs that tell you it’s time to refresh them properly.
- Muffled or Distorted Audio: Sound becomes noticeably unclear when debris blocks the speaker mesh and reduces overall audio performance.
- Reduced Comfort or Irritation: Your ears may feel slightly irritated when unclean tips accumulate sweat, oils, and environmental particles.
- Weak Charging or Intermittent Contact: The earbuds sometimes fail to charge correctly because dust settles inside the charging connectors.
- Persistent Odor from Ear Tips: A mild, unpleasant smell appears when moisture and bacteria collect on the silicone tips over time.
- Loose or Slipping Fit: They start slipping during movement since built-up residue weakens the grip between your ears and silicone tips.
- Visible Wax or Dust Buildup: Small clumps of wax or dust appear around openings, indicating the earbuds urgently need cleaning.
How Do I Clean Groovz Earbuds?
Maintaining the cleanliness of your Groovz earbuds helps preserve their comfort, long-term durability, and sound quality while avoiding buildup-related performance problems. A simple routine protects your listening experience and extends the product’s lifespan. Continue reading to explore the next helpful section.
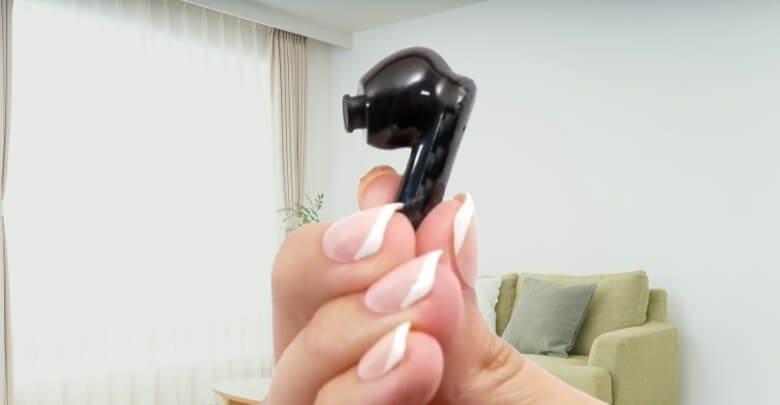
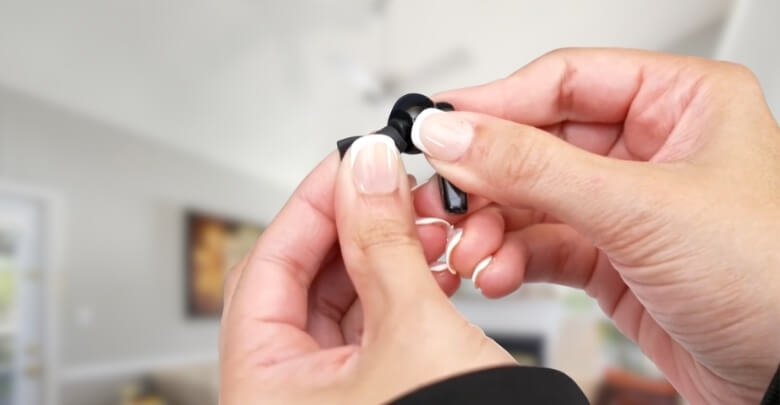
Remove and Clean the Silicone Ear Tips
Gently detach the silicone ear tips and rinse them with warm soapy water, ensuring any trapped residue loosens before drying completely. This step restores the original fit and prevents irritants from affecting your ears during extended use.
Wipe the Earbuds Using a Soft Dry Cloth
Use a clean microfiber cloth to wipe away dust, oils, and fingerprints from each earbud surface without applying excessive pressure. Keeping the external shell clean protects internal components and maintains a polished, hygienic appearance over time.
Clear the Speaker Mesh with a Soft Brush
Carefully sweep a dry, soft-bristled brush across the speaker mesh to remove debris that may weaken audio clarity. Avoid using liquids on the mesh so you do not accidentally push moisture inside sensitive openings.
Disinfect Earbuds with a Slightly Dampened Alcohol Wipe
Lightly clean the exterior using a cloth dampened with isopropyl alcohol to eliminate bacteria, a step often emphasized in a detailed Groovz Audio review for maintaining safe and dependable earbud hygiene. This helps prevent odor buildup while protecting sensitive surfaces from excess moisture exposure.
Clean the Charging Case Interior Gently
Use a cotton swab to tidy the charging ports and interior walls of the case, removing dust that may interfere with charging. Keeping the case clean ensures reliable power transfer and prevents long-term connection issues.
Allow All Parts to Dry Fully Before Reassembly
Make sure the earbuds and ear tips are completely dry before putting them back together to avoid moisture damage. Proper drying helps maintain the product’s integrity and ensures consistent performance every time you use it.
What to Avoid When Cleaning Groovz Earbuds?
Proper cleaning keeps your Groovz earbuds performing well, but using the wrong methods can easily damage the internal components and weaken overall durability. Avoiding common mistakes helps maintain sound quality and reliability. Continue reading to learn what comes next.
- Avoid soaking your earbuds in water because moisture can seep into internal parts and permanently damage sensitive electronic components.
- Do not use harsh cleaning chemicals since strong liquids can weaken protective coatings and reduce the long-term durability of both earbuds and the charging case.
- Never poke the speaker mesh with needles or sharp tools because this can puncture delicate layers and significantly affect overall audio clarity and sound balance.
- Avoid using overly damp cloths during cleaning since excess moisture may enter small openings and interfere with microphone and speaker functionality.
- Do not expose your earbuds to hair dryers or direct heat, as high temperatures can warp materials and degrade battery performance over time.
- Never reassemble the earbuds before the parts fully dry because lingering moisture may disrupt charging contacts and lead to short-term functional issues.
Keeping these mistakes in mind ensures your Groovz earbuds stay clean, safe, and consistently dependable. Maintain proper care to preserve sound quality and extend their everyday lifespan.
How Often Should You Clean Groovz Earbuds?
Keeping your Groovz earbuds clean helps maintain comfort, hygiene, and consistent audio performance during daily use. A simple routine prevents buildup and keeps them working reliably. Here is how often you should clean them.
Clean Light Surface Dirt After Every Use
Wipe the earbuds gently with a soft dry cloth after each session to remove oils and fingerprints that accumulate naturally. This prevents early buildup and helps maintain both comfort and hygiene throughout your daily routine.
Deep Clean Ear Tips Once or Twice Weekly
Wash the silicone ear tips with warm soapy water once or twice a week to remove trapped residue and restore a proper seal. Frequent cleaning supports better comfort, improved sound insulation, and a fresher wearing experience.
Brush the Speaker Mesh Every Few Days
Use a soft brush every few days to remove dust and tiny particles for noticeable sound clarity improvement while ensuring audio output remains consistent during regular listening sessions. This simple maintenance step prevents blockage and keeps your earbuds performing at their best.
Disinfect Exterior Surfaces Weekly
Gently clean the outer shell using a lightly dampened alcohol wipe once a week to remove bacteria from daily contact. This practice keeps the earbuds hygienic, especially for users who wear them during workouts or extended hours.
Clean the Charging Case Interior Weekly
Tidy the case interior weekly with a dry cotton swab to clear dust from charging contacts and corners. Maintaining a clean case supports reliable power transfer and prevents long-term connection issues that could interrupt your listening routine.
Increase Cleaning Frequency During Heavy Use
If you use your earbuds for exercise, commuting, or long workdays, clean them more often to prevent accelerated buildup. Extra care helps maintain optimal performance and extends overall durability during demanding daily patterns.
Troubleshooting Groovz Earbuds After Cleaning
Cleaning your Groovz earbuds sometimes reveals small issues that appear afterward and require quick attention. Most of these problems are easy to fix with simple adjustments. Here are common troubleshooting actions that help restore normal performance.
- Audio Sounds Low or Weak: Dry moisture near the speaker area carefully. Adjust the fit to regain balanced volume during listening.
- Earbuds Not Charging Properly: Clean the charging pins gently. Ensure the earbuds sit correctly inside the case without shifting positions.
- Bluetooth Connection Keeps Dropping: Restart pairing mode. Keep your device closer to stabilize the signal and improve connection strength quickly.
- Touch Controls Stop Responding: Check for residue on the touch panel. Wipe it lightly to restore accurate tap detection during everyday use.
- Microphone Quality Becomes Poor: Inspect the mic openings for debris. Remove particles carefully to improve voice pickup during calls immediately.
- One Earbud Fails to Activate: Place both earbuds in the case briefly. Allow them to reset and reconnect as a synchronized pair again.
When to Replace Ear Tips or Seek Professional Help?
Replacing worn parts at the right moment protects both performance and hygiene, while knowing when to involve support prevents deeper hardware failures. These signs help you decide whether a simple swap or professional assistance is the safer option. Continue reading to move into the next essential section.
Replace Ear Tips When the Seal No Longer Holds
If you notice the earbuds losing bass, slipping during movement, or failing to create a proper seal, the silicone has likely softened. Fresh tips immediately restore passive noise isolation, audio accuracy, and a stable fit that keeps the earbuds anchored comfortably.
Change Ear Tips When Texture or Flexibility Feels Different
When silicone feels unusually stiff, sticky, or thin, the material has begun to break down from sweat and daily use. Replacing the tips prevents irritation, reduces bacterial buildup, and ensures the earbuds maintain their intended comfort profile.
Swap Ear Tips When Cleaning No Longer Restores Clarity
If deep cleaning fails to improve sound or the tips still look misshapen afterward, structural wear is the cause. A new pair restores balanced acoustics, consistent airflow, and even pressure distribution across the ear canal.
Seek Professional Support When Charging Issues Keep Returning
Persistent charging interruptions even after cleaning the case, ports, and pins usually indicate weakened internal contacts. Professional service can diagnose case circuitry, battery health, or connector alignment issues that user-level cleaning cannot safely address.
Get Help When Connectivity Behaves Unpredictably
If Bluetooth drops occur even in close range after resets and repairs, the Bluetooth module or devices compatible with Groovz may be unstable. Expert diagnostics prevent misalignment of internal components and ensure the earbuds receive the correct firmware or hardware correction.
Contact Support Immediately for Structural Damage
Any cracks around the stem, loosened housings, rattling sounds inside, or gaps near the speaker grill signal compromised internal protection. Attempting home repair risks moisture intrusion and further damage, so factory support is the safest option.
Timely replacement and expert guidance help your Groovz earbuds stay dependable, comfortable, and safe to use. Addressing issues early prevents performance decline and extends the life of both the earbuds and their accessories.
Frequently Asked Questions
Regular questions often come up for users wanting to keep their Groovz earbuds in top condition. These FAQs are designed to give clear, helpful answers based on what people commonly search online. They support a deeper understanding while improving your overall maintenance routine.
What Causes Earbuds to Accumulate Dirt Quickly?
Earbuds collect dirt due to skin oils, sweat, lint, and environmental particles that build up during daily use. Frequent movement and storage in pockets or bags also increase the rate of debris accumulation.
Why Do Earbuds Lose Their Sound Quality Over Time?
Sound quality can drop when internal components face dust blockage, aging drivers, or loose seals caused by worn ear tips. Regular cleaning and occasional part replacement help maintain consistent performance.
How Can I Store Groovz Earbuds Safely to Prevent Damage?
Store the earbuds inside their charging case when not in use to protect them from moisture, dust, and accidental impacts. Avoid leaving them in hot or humid environments for long periods.
What Should I Do If One Earbud Sounds Lower Than the Other?
Check for debris in the speaker mesh, clean both earbuds thoroughly, and test them again. If the imbalance remains, reset the earbuds through the case to reestablish proper audio synchronization.
When Should I Reset Groovz Earbuds After Cleaning?
Reset them if audio feels uneven, Bluetooth pairing becomes inconsistent, or touch controls behave unpredictably. A reset helps recalibrate internal sensors and restores stable performance.
Which Cleaning Tools Are Safe for Everyday Earbud Maintenance?
Soft microfiber cloths, dry brushes, cotton swabs, and mild soap for silicone tips are all safe. Avoid pointed tools and abrasive materials that may damage the earbuds.
How Can I Prevent Moisture Buildup Inside My Earbuds?
Allow earbuds to air dry after workouts, store them in a dry case, and avoid cleaning with overly wet cloths. Moisture control helps maintain internal integrity.
What Makes Groovz Earbuds More Durable With Proper Maintenance?
Consistent cleaning, correct storage, and timely part replacement reduce strain on internal components. This preserves sound quality, enhances battery health, and extends overall product lifespan.
Conclusion
Keeping your Groovz earbuds clean and well-maintained helps you enjoy better sound, longer product life, and a more comfortable daily experience. Understanding how do I clean Groovz earbuds gives you a simple routine that protects both performance and hygiene with very little effort.
By following the right cleaning steps, avoiding common mistakes, and knowing when to replace parts or ask for help, you keep your earbuds working like new. Consistent care ensures clearer audio, easier charging, and a dependable fit every time you use them.


