
Ever looked at your phone storage and wondered how a few photos turned into thousands? I know how frustrating it feels to deal with a crowded photo library. Deleting precious memories isn’t exactly my idea of freeing up space.
That’s what made ThePhotoStick Omni X catch my attention. It’s a portable backup device that helps save and organize photos and videos without relying entirely on cloud storage. I especially like the idea of using one device for different phones and computers.
But does it actually make photo backups easier? In my ThePhotoStick Omni X review, I’ll share my experience, explore its features, and explain how it works. I’ll also cover compatibility, storage options, pricing, and whether it’s worth your money.
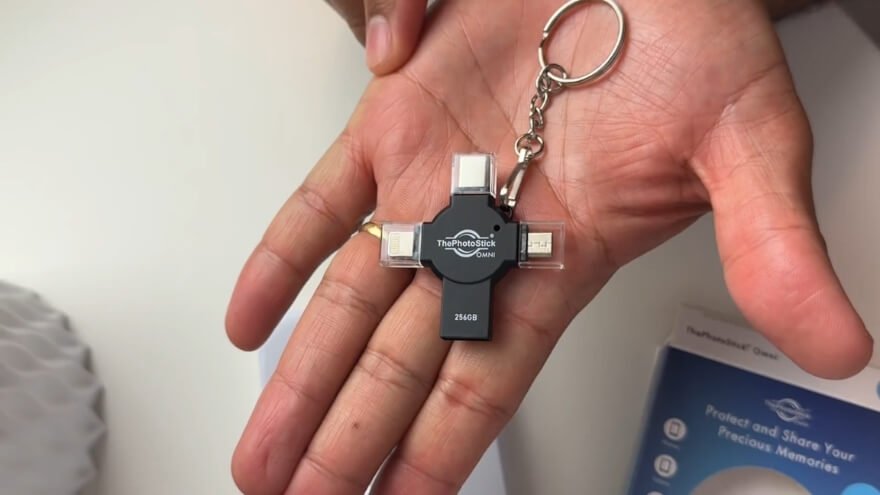
ThePhotoStick Omni X is a portable storage device designed to back up photos, videos, and other supported files from compatible phones and computers. It combines physical storage with software that helps identify and copy files without requiring users to find everything manually. Its main purpose is to make personal file backups easier to manage.
- Four connector types support a broader range of compatible devices.
- Supports common photo, video, and additional file formats.
- Duplicate handling can reduce unnecessary repeat copies.
- Generally more expensive than basic USB storage.
ThePhotoStick Omni X: My First Impressions
ThePhotoStick Omni X is a practical option for people who want guided photo backups across different devices. I like its multiple connectors and straightforward storage concept, especially for users managing pictures on phones and computers. However, it costs more than many basic USB drives, so the extra convenience must justify the price.
What Is ThePhotoStick Omni X?
ThePhotoStick Omni X is a portable storage device designed to back up photos, videos, and other supported files from compatible phones and computers. It combines physical storage with software that helps identify and copy files without requiring users to find everything manually. Its main purpose is to make personal file backups easier to manage.
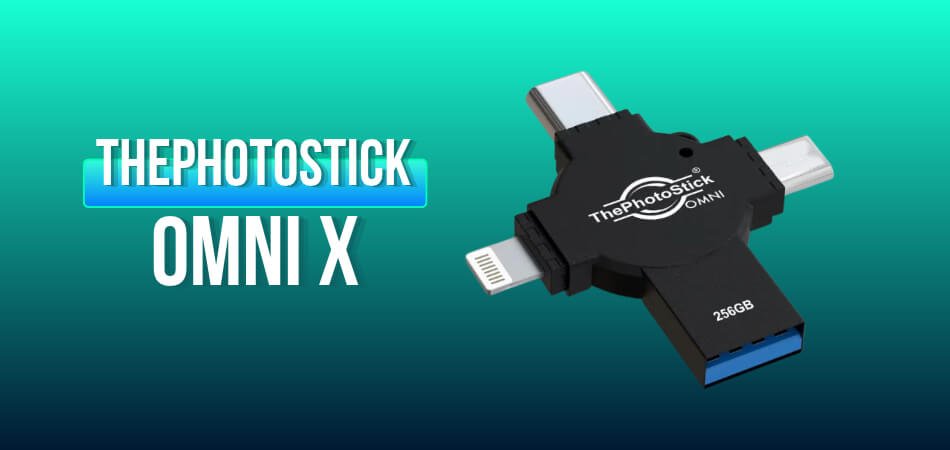
Unlike a regular USB stick with one connector, Omni X includes USB-A, USB-C, Lightning, and Micro-USB connections. This design allows it to connect to several types of devices without relying on a separate collection of adapters. Compatibility still depends on the device’s operating system, permissions, and supporting software.
I see Omni X as a dedicated photo-backup tool rather than a replacement for an entire computer or phone backup system. It can store copies of supported personal files, but it doesn’t recreate a phone’s apps, settings, messages, and complete operating system. Understanding that distinction is important because saving photos and creating a complete device backup are two different jobs.
ThePhotoStick Omni X Key Features and Benefits
ThePhotoStick Omni X combines portable storage, guided file scanning, multiple connectors, and photo-management tools. Its biggest advantage is making the backup process more approachable for people who don’t enjoy sorting through folders. Some features are particularly useful for everyday backups, while others depend on software support and individual needs.
Automatic Photo and Video Scanning
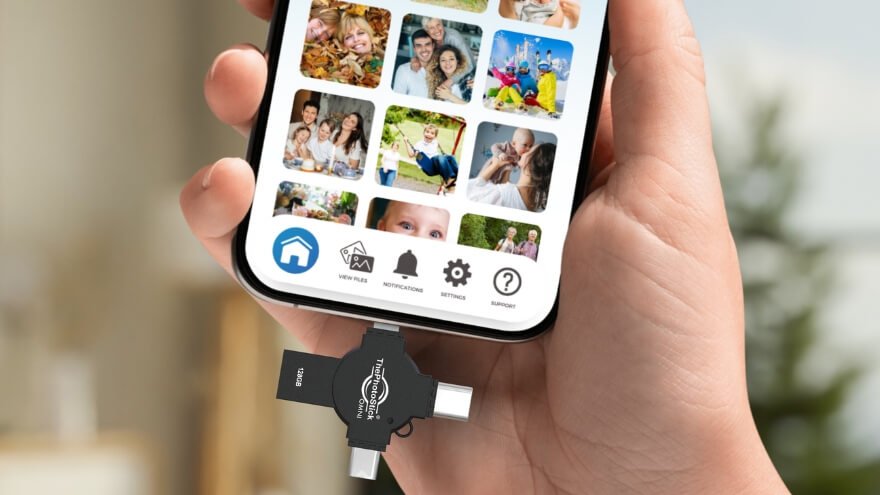
The automatic scanning feature helps locate supported photos and videos within the storage areas the software can access. Rather than opening every folder manually, users can start a scan and let the application identify eligible files. This can save effort when pictures are scattered across different locations.
I like the idea of reducing the number of decisions involved in a routine backup. However, an automatic scan cannot necessarily access every file stored on a phone or computer, particularly files restricted by permissions or stored only in the cloud. Reviewing the results is still important before assuming everything has been included.
Four Connectors for Different Devices
The four built-in connectors are among Omni X’s most useful physical features. USB-A is common on computers, while USB-C appears on newer phones, tablets, and laptops. Lightning and Micro-USB support additional generations of devices with matching ports.
This flexibility matters when a household has several phones and computers. I appreciate the convenience of using one storage device instead of buying a different drive for each connector type. However, having the right connector doesn’t guarantee that every device or operating system will support the software.
Duplicate Photo Handling
Omni X includes software designed to recognize duplicate files during the backup process. The goal is to avoid saving unnecessary repeat copies and wasting storage space. This can be helpful when the same picture has appeared in several folders or previous backups.
There is an important difference between recognizing duplicates and identifying every visually similar image. A resized picture, edited photograph, or compressed copy might not be treated as identical to the original. I wouldn’t count on the duplicate feature to clean an entire photo collection perfectly or remove unwanted files from the original device.
Organized Backup and File Management
The companion software includes tools for scanning, backing up, viewing, and managing files. Its interface also includes album and file-browsing options, making it possible to inspect stored content rather than treating the drive as a mysterious black box. This organization can make a growing collection easier to review.
What I appreciate is the distinction between finding files and saving them. Users can approach backup as a series of understandable actions instead of one unfamiliar technical process. Even so, automatic organization won’t necessarily produce a perfectly arranged photo library with every event, person, and date grouped correctly.
AI Photo Enhancement Tools
ThePhotoStick Omni X’s companion software also includes AI-related photo tools, including Photo Colorizer, Photo Restorer, Photo Upscaler, and Object Remover. These functions are intended to help improve or modify existing images. They are separate from the device’s main job of saving backup copies.
The restoration and upscaling tools are particularly interesting for older or lower-quality photographs. However, AI can generate or alter visual details rather than recover information that was never captured. I would also check the current app’s availability, usage conditions, and possible extra charges before treating these tools as an unlimited benefit of buying the drive.
How Does ThePhotoStick Omni X Work? Technology Explained
ThePhotoStick Omni X works by transferring supported files from a compatible phone or computer onto its own storage. The physical drive holds the copied data, while the companion software helps users locate and organize files. The technology is familiar removable storage combined with a more guided backup process.

Step 1: The Device Establishes a Storage Connection
When Omni X is connected to a supported device, the operating system and companion software must recognize the connection. The appropriate connector provides a physical route for transferring data between the two devices. On phones, access can also depend on permissions granted to the application.
This connection isn’t the same as uploading files to an internet server. The ordinary backup process transfers data to local physical storage rather than requiring a cloud storage account. Internet access may still be needed for downloading software, updates, or features that use online processing.
Step 2: The Software Finds Supported Files
The application scans accessible storage locations for file types it recognizes. It identifies eligible media and prepares them for copying, reducing the need to search through folders individually. Depending on the platform, users may need to grant access to photos or other files before scanning works properly.
The scan also has practical limits. Files that exist only as cloud placeholders may need to be downloaded before a complete local copy is available. Similarly, files inside restricted applications may not be accessible through the normal backup process.
Step 3: Files Are Copied and Managed
During backup, data is copied from the original device to the storage drive. The software can use file information to organize saved items and handle recognized duplicates. The copied files remain on the drive until they are moved or deleted.
This process doesn’t automatically mean that the originals have been removed from the phone or computer. That’s useful because it allows users to inspect their backup before making changes to their original library. I strongly prefer this cautious approach, since a backup that hasn’t been checked shouldn’t be trusted with irreplaceable memories.
My User Experience With ThePhotoStick Omni X
After trying ThePhotoStick Omni X, the feature I find most appealing is the way it brings the backup process into one focused workflow. The separate options for scanning, backing up, and viewing files make the purpose of each action easier to understand. For someone who mainly wants to save personal pictures, that feels more approachable than managing a collection of unfamiliar folders.

I also appreciate the practical thinking behind the multiple connectors. Many people replace their phones without replacing their computers, leaving them with different USB ports across their devices. Having several connectors in one drive addresses that everyday problem without making the product unnecessarily complicated.
However, I don’t think a simple interface should be confused with guaranteed backup success. The important question is whether the files are accessible and usable after the transfer, not merely whether the application displays a completion message. I wouldn’t judge the device by a single backup time either, since a folder containing small photos is very different from one filled with large videos.
My overall impression is that Omni X makes the idea of regular backups less intimidating. Its strongest appeal is convenience rather than a dramatic improvement in storage technology. I still believe users should verify important files and maintain another backup for anything they cannot afford to lose.
ThePhotoStick Omni X Compatibility and Supported File Types
ThePhotoStick Omni X supports compatible iPhones, iPads, Android devices, Windows computers, and Macs. It is designed to handle many common photo and video formats, along with additional supported file types. However, operating system requirements and file access matter just as much as the physical connector.
Supported Devices and Operating Systems
| Device | Listed operating system requirement |
| iPhone and iPad | iOS/iPadOS 13 or later |
| Android phones and tablets | Android 8 or later |
| Windows computers | Windows 7 SP1 or later |
| Mac computers | macOS 10.13 or later |
These are the compatibility requirements associated with the product information reviewed. Some specific Android devices, including newer Pixel models, may have additional compatibility considerations. I recommend checking the exact phone model and supported app requirements before purchasing, especially when using an older or less common device.
Supported File Formats
Omni X is designed to recognize more than 100 file types, although the complete extension list isn’t available here. Its supported formats include common image files such as JPG, JPEG, PNG, HEIC, GIF, TIFF, and BMP. It also supports various video formats, including MP4, MOV, AVI, and other compatible media files.
Support for selected camera RAW files, documents, music, and voice recordings adds flexibility beyond ordinary smartphone pictures. However, recognizing a file format doesn’t guarantee that every application can preview or edit that file. Specialized formats may still require suitable software when opened later.
ThePhotoStick Omni X Storage Capacities: How Many Photos Can It Hold?
ThePhotoStick Omni X comes in several storage capacities, including 32GB, 64GB, 128GB, and 256GB. The number of files each version can hold depends heavily on image quality, video length, and individual file sizes. That’s why I treat promotional photo counts as estimates rather than guaranteed storage results.
| Capacity | Photo estimate in product FAQ | Promotional maximum file estimate |
| 32GB | 12,800 | Up to 15,000 |
| 64GB | 25,600 | Up to 30,000 |
| 128GB | 51,200 | Up to 60,000 |
| 256GB | 102,400 | Up to 120,000 |
The two sets of numbers use different assumptions, so neither should be treated as an exact capacity promise. A large 4K video can occupy far more space than hundreds of compressed photographs. The usable space on a formatted storage device is also slightly lower than its headline capacity.
Which Capacity Would I Choose?
For a relatively small photo collection, 32GB or 64GB may provide enough room for regular backups. I would consider 128GB for a larger collection containing plenty of photos and shorter videos. The 256GB option makes more sense when storage needs are substantial and the convenience of keeping everything together is worth the additional cost.
Before buying, I recommend checking how much space the intended files already occupy. That number provides a more useful starting point than an advertised maximum photo count. Leaving extra room for future pictures and videos also helps avoid having to replace a nearly full drive too soon.
How I Set Up and Tested ThePhotoStick Omni X
Setting up ThePhotoStick Omni X is straightforward once you know which app to install and how to connect the drive. The process involves downloading the free ThePhotoStick Omni app, allowing file access, choosing a backup option, and saving your photos and videos. I consider checking the saved files an essential part of testing because a completed backup is only useful when you can open your files again.

Step 1: Check Your Device Compatibility
Before getting started, make sure your phone, tablet, or computer supports ThePhotoStick Omni X. The device works with iOS/iPadOS 13 or later, Android 8 or later, Windows 7 SP1 or later, and macOS 10.13 or later. Google Pixel users should also check their model because support starts with the Pixel 8.
For a mobile backup, I recommend charging your phone before connecting the drive. A large photo collection can take time to copy, especially when it contains high-resolution videos. You should also close unnecessary apps to reduce interruptions during the process.
Step 2: Download and Install ThePhotoStick Omni App
ThePhotoStick Omni X uses a free companion app to find, back up, and organize files on mobile devices. You don’t need to purchase the app or subscribe to a monthly storage plan to perform ordinary local backups. Installing the correct application is the first important step.
For iPhone or iPad:
- Open the App Store.
- Tap the search icon.
- Search for ThePhotoStick Omni.
- Find the official app and tap Get.
- Wait for installation, then tap Open.
For Android phones or tablets:
- Open the Google Play Store.
- Search for ThePhotoStick Omni.
- Select the official application.
- Tap Install.
- Once installed, tap Open.
The application may ask for permission to access your photos, videos, or other files. These permissions allow the software to locate the content you want to back up. If you accidentally deny access, you can usually adjust the permissions later through your phone’s settings.
Step 3: Connect ThePhotoStick Omni X to Your Phone
After installing the application, connect ThePhotoStick Omni X directly to your phone’s charging or data port. Use its Lightning or USB-C connector for a compatible iPhone, or USB-C or Micro-USB for a compatible Android device. You don’t need a separate charging cable because the device receives power through the connection.
Make sure the connector fits securely into the phone. Some thick protective cases can prevent the drive from connecting properly, so removing the case may help. A red indicator light should appear when the device receives power, although the app must still recognize the drive before a backup can begin.
Step 4: Open the App and Follow the Setup Tutorial
Launch the ThePhotoStick Omni app while the drive is connected. On the initial setup screen, tap GET STARTED to open the guided tutorial. Read the instructions or watch the short video, then tap NEXT to continue.
When the connection screen appears, select CONNECT DEVICE to proceed. The wording may appear slightly differently depending on your installed app version. This step prepares the application to access the removable storage device.
Step 5: Select the PHOTOSTICK Drive
The application needs to know where your backup files should be saved. Selecting the correct destination is important because your phone may display more than one storage location. The process differs slightly between iPhone and Android.
On iPhone or iPad:
- Tap BROWSE when the file-selection window appears.
- Look for a drive named PHOTOSTICK.
- Tap PHOTOSTICK to select it.
- Tap OPEN in the upper-right corner.
- Select BACK TO HOME to return to the app.
On Android:
- Tap the menu icon with three horizontal lines.
- Find the storage device named PHOTOSTICK.
- Select the drive.
- Tap USE THIS FOLDER.
- Confirm the access request when prompted.
Sometimes the device appears as Generic USB Device instead of PHOTOSTICK. That doesn’t automatically mean something is wrong, but you should confirm you’re selecting the connected drive. If the storage device doesn’t appear at all, reconnect it and check that your phone supports external USB storage.
Step 6: Allow Access to Your Photos and Files
ThePhotoStick Omni needs permission to access the files you want to copy. Without the appropriate permissions, the app may find only part of your photo library or fail to scan it properly. I recommend checking this before starting a large backup.
On iPhone: Tap Allow Full Access when the application requests permission to use your photo library.
On Android: Enable All Files Access if prompted, then tap Allow when the app requests permission to access supported files.
If you previously denied a permission, open your phone’s settings and locate ThePhotoStick Omni under its application permissions. Update the relevant photo or file access settings, then reopen the app. Remember that granting access allows the application to read supported files, so use only the official software.
Step 7: Choose What You Want to Back Up
Once the drive is connected and permissions are granted, return to the app’s main screen. Tap BACK UP FILES NOW to begin choosing your backup settings. The application offers different options depending on how much control you want over the files being saved.
| Backup option | What it does |
| BACK UP ALL FILES | Searches accessible locations and backs up eligible files |
| BACK UP SELECTED FILES | Lets you choose specific files to save |
| ADVANCED: SELECTED FILE TYPES | Lets you select categories such as images, videos, audio, contacts, or documents |
For a first backup, the all-files option is the simplest starting point when you want a broad copy of your supported media. Selected-files mode makes more sense when you only need particular photos or videos. The advanced option is useful if you want to concentrate on one type of content without copying everything.
Step 8: Start the Scan and Complete Your Backup
After choosing your backup option, follow the on-screen instructions to begin scanning and copying files. The application searches the storage locations it can access and transfers eligible content onto ThePhotoStick Omni X. Keep the drive connected throughout the process.
Backup time varies depending on the number and size of your files, your device, and the connection. Thousands of photographs may take considerably longer than a small selection of pictures. Avoid closing the application or disconnecting the drive while files are being transferred.
If you need to interrupt the process, use PAUSE BACKUP when that option is available. You can select RESUME BACKUP to continue afterward. I prefer using the application’s controls rather than unplugging the device in the middle of a transfer.
Step 9: Open Your Saved Files and Check the Backup
Once the backup finishes, return to the application’s home screen and tap VIEW FILES. This allows you to browse photos and videos stored on ThePhotoStick Omni X. I consider this one of the most important steps because a completion message alone doesn’t prove that every important file is accessible.
Open a few photographs and videos from different parts of your collection. Check that the images display correctly and that the videos play without obvious problems. If your backup contains particularly important files, compare them with the originals to make sure the correct versions were saved.
It’s also sensible to check whether the storage drive contains the amount of content you expected. A smaller-than-expected backup doesn’t automatically indicate failure, since duplicate handling and file permissions can affect the results. However, missing folders or inaccessible files deserve investigation before you remove anything from your phone.
Step 10: Test Whether You Can Restore a File
A useful backup should allow you to access your saved files again when needed. To check this, select a backed-up photo or video and look for an available option to save or copy it back to your device. Depending on the software and operating system, this may appear as Save to Device, a sharing option, or a file-copying action.
Choose a test file rather than an irreplaceable original. Save the copy to an accessible location and open it to confirm that it works. This simple check provides more useful reassurance than relying entirely on the backup completion screen.
You can also use a compatible computer to inspect files stored on the drive. Open the appropriate file manager and browse the PHOTOSTICK storage location when it appears. Confirming that the files can be accessed independently gives you another way to evaluate your backup.
Step 11: Safely Disconnect ThePhotoStick Omni X
When you’ve finished checking your files, make sure no backup, scanning, or file-transfer operation is running. Removing a storage device during a transfer can interrupt file copying and potentially damage the data being written. I recommend disconnecting it carefully rather than treating it like a charging cable.
On iPhone or iPad: Finish all file operations and close the app before unplugging the drive. iOS doesn’t normally provide a separate USB eject button for this type of storage.
On Android: Open your phone’s storage settings or file manager and look for Eject or Unmount beside the connected USB drive. Once the system confirms that the drive is no longer in use, disconnect it.
Store the drive somewhere safe after removing it. Since the files exist on physical storage, the device itself needs protection from loss and damage. For important family photos and videos, I still recommend keeping an additional backup elsewhere.
Using ThePhotoStick Omni X on Windows or Mac
ThePhotoStick Omni X also supports backups from compatible Windows and macOS computers. The process differs from the mobile setup because you install the desktop software rather than using the phone app. Once installation is complete, the program guides you through finding and copying supported files.
For Windows:
- Insert Omni X into a compatible USB port.
- Open File Explorer if the installer doesn’t appear automatically.
- Select the ThePhotoStick Omni drive.
- Double-click Install_ThePhotoStick_Omni_Windows.
- Follow the installation instructions.
- Open the software and follow the prompts to start your backup.
For Mac:
- Connect Omni X to a compatible USB port.
- Open Finder and locate PHOTOSTICK under Locations.
- Open Install_ThePhotoStick_Omni_macOS.dmg.
- Drag the application into your Applications folder.
- Open ThePhotoStick Omni and follow the instructions.
- Start the backup after the software recognizes the drive.
After completing a computer backup, use File Explorer or Finder to inspect the stored files. Open several images and videos before deciding that the backup is complete. Always use the operating system’s eject function before removing the drive.
My Take on the Setup Process
What I appreciate about ThePhotoStick Omni X is that the application handles much of the file-finding work once the initial connection is complete. The most important part for beginners is selecting the correct storage destination and granting the necessary permissions. After that, choosing a backup option and following the progress screen is relatively straightforward.
I wouldn’t judge its performance by a fixed backup time because every photo library is different. What matters more to me is whether the saved files are complete, accessible, and easy to retrieve. A few extra minutes checking the backup can prevent a much bigger headache later.
What I Like About ThePhotoStick Omni X
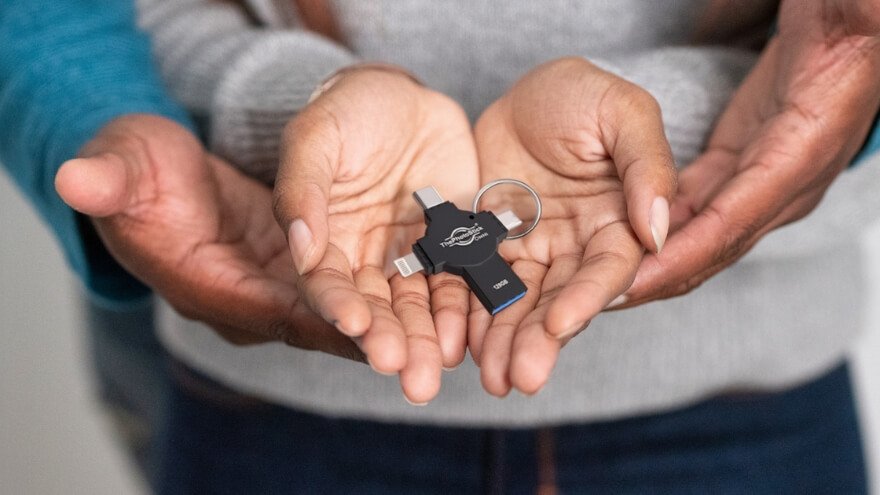
What I like most about ThePhotoStick Omni X is its focus on an ordinary but important task: keeping a separate copy of personal memories. The combination of connectors and guided software makes sense for people who use several devices. Its strengths are practical rather than flashy, which I consider a positive quality in a backup product.
A Simpler Approach to Photo Backups
I appreciate that users can start with a scan instead of manually collecting files from scattered folders. That makes the backup process more manageable, particularly when someone’s photo library has grown over several years. The less complicated a routine feels, the more likely people are to repeat it.
One Drive for Different Devices
The combination of USB-A, USB-C, Lightning, and Micro-USB is a thoughtful design choice. It reduces the inconvenience of matching separate drives to older and newer hardware. I especially like this approach for households where photos are stored across multiple phones and computers.
Local Storage Without a Required Cloud Subscription
Another advantage is the ability to keep ordinary backup copies on physical storage without paying a recurring cloud storage fee. That can be appealing to people who prefer to control where their photos are saved. Of course, owning a drive also means taking responsibility for protecting it from loss, damage, or failure.
ThePhotoStick Omni X vs USB Drives and Cloud Storage
ThePhotoStick Omni X differs from regular USB drives mainly through its connector options and guided photo-backup software. A standard USB stick can often provide inexpensive general storage, while cloud services offer the advantage of keeping files away from your physical devices. Each option solves a slightly different problem.
| Feature | ThePhotoStick Omni X | Regular USB Drive | Cloud Storage |
| Main purpose | Guided file backup | General file storage | Online backup and syncing |
| Storage location | Physical drive | Physical drive | Remote servers |
| Photo scanning | Companion software | Usually manual or separate software | Depends on service |
| Multiple connectors | Four connector types | Varies by model | No USB connection required |
| Internet for ordinary backup | Not normally required | Not required | Usually required for upload |
| Ongoing storage fee | None required for local storage | None | Depends on service and plan |
| Main limitation | Higher convenience-focused cost | More manual work | Internet and account dependence |
Omni X vs a Regular USB Drive
A basic USB drive may be the better value for someone who is comfortable copying files manually. Many standard drives provide substantial storage without the added cost of specialized photo-backup software. However, Omni X is more appealing when users want guidance finding and saving supported media.
Omni X vs Cloud Storage
Cloud storage is useful because important files can remain available even if a phone or physical drive is lost. It can also make automatic syncing between devices convenient, depending on the service. Omni X offers a different benefit by keeping a local copy under the user’s physical control.
My preference is not to treat these options as enemies competing for one winner. A separate local backup and an independent cloud or off-site backup can provide stronger protection together. One copy on a portable drive is useful, but it shouldn’t be the only surviving copy of irreplaceable photographs.
Who Should Buy ThePhotoStick Omni X?
ThePhotoStick Omni X is best for people who want an easy way to back up photos and videos without depending entirely on cloud storage. Its guided backup software, multiple connectors, and portable design make it particularly useful for everyday photo management. I recommend it for buyers who value convenience and simplicity over finding the cheapest possible storage.
Who Should Buy ThePhotoStick Omni X?
ThePhotoStick Omni X suits several types of users, especially those who regularly save photos across different devices. I think its biggest advantage is reducing the effort involved in creating local backups. Here are five groups who could benefit most from it.
1. People Running Out of Phone Storage
If your phone constantly warns you about low storage, Omni X could be a useful solution. It lets you create separate copies of supported photos and videos without depending entirely on cloud storage. I particularly like this option for people who want to free up space after confirming their important files have been backed up successfully.
2. Beginners Who Want Simple Photo Backups
Not everyone enjoys searching through folders, connecting cables, and manually transferring hundreds of pictures. ThePhotoStick Omni X uses guided software to scan for supported files and simplify the backup process. I think it’s especially suitable for beginners and less technical users who prefer clear instructions over complicated file management.
3. People Using Multiple Phones and Computers
If your photos are scattered across an iPhone, Android phone, Windows PC, or Mac, managing separate backups can become frustrating. Omni X includes USB-A, USB-C, Lightning, and Micro-USB connectors, making it convenient for a range of compatible devices. I appreciate this flexibility because it reduces the need to purchase different storage drives for different connections.
4. Families Preserving Important Photos and Videos
Family photographs, childhood memories, holiday videos, and special occasions can build up over many years. Omni X provides a physical place to keep additional copies of those important files, with different capacities available for different collection sizes. I see it as a useful part of a family backup routine, although irreplaceable memories should also have another independent backup.
5. People Who Prefer Local Storage Over Cloud Subscriptions
Some people prefer keeping personal photos on a physical device instead of relying entirely on online storage services. ThePhotoStick Omni X supports ordinary local backups without requiring a monthly cloud storage subscription. I think this makes it appealing to users who want direct control over their files, provided they’re comfortable taking responsibility for storing and protecting the drive.
Who Should Consider a Different Option?
ThePhotoStick Omni X isn’t the best choice for everyone, particularly when low cost, automatic online syncing, or complete device recovery matters most. Its main selling point is convenient photo backup rather than maximum storage performance. I would consider these alternatives before buying:
- Budget-conscious buyers: A regular USB drive may offer more storage for less money if you’re comfortable transferring files manually.
- People who need automatic cloud syncing: Services such as iCloud or Google Photos may be more suitable for keeping files synchronized across devices.
- Professional photographers and video editors: High-capacity external SSDs may be better for storing large RAW files, extensive video libraries, and demanding editing projects.
- Users who need complete device backups: Dedicated backup software is more appropriate for preserving operating systems, applications, settings, and recovery data.
- People who want automatic off-site protection: A cloud or remote backup service can protect important files even if a physical storage device is lost, stolen, or damaged.
ThePhotoStick Omni X Pros and Cons
ThePhotoStick Omni X stands out for its easy backup process, multiple connectors, and useful photo-management features. I particularly appreciate how it simplifies a task that often feels complicated with ordinary USB drives. Although there are a few minor trade-offs, its convenience makes it an appealing option for everyday photo backups.
Overall, I think ThePhotoStick Omni X offers a good balance of simplicity, flexibility, and practical features. Its main advantages are the guided backup process and compatibility with different types of devices. For someone who values convenience over the lowest storage price, these benefits make it worth considering.
How Much Does ThePhotoStick Omni X Cost?
ThePhotoStick Omni X costs $34.99 to $174.99, depending on the storage capacity. The promotional offer includes four options, from 32GB to 256GB, with approximately 50% off the listed retail prices. I think the 128GB version offers a good balance of price and storage, while the 256GB option suits larger photo and video collections.
| Storage Capacity | Sale Price (USD) | Shipping |
| 32GB | $34.99 | |
| 64GB | $69.99 | Free |
| 128GB (Most Popular) | $109.99 | Free |
| 256GB (Best Deal) | $174.99 | Free |
These prices come from the promotional offer, which describes the discounts as available for a limited time. The 32GB package is advertised to hold up to 15,000 photos and videos, while the 256GB version claims up to 120,000. Actual capacity depends on file sizes, so I recommend checking your storage needs before choosing.
Shipping and Additional Discounts
ThePhotoStick Omni X offers free shipping on the 64GB, 128GB, and 256GB packages, alongside an advertised worldwide delivery service. Customers purchasing additional units can also receive 60% off each extra device with the 32GB, 64GB, or 128GB offers. The 256GB package increases that additional-unit discount to 70%, making it worth considering for families buying multiple devices.
Payment and Installment Options
The checkout supports Visa, Mastercard, American Express, Discover, PayPal, and Google Pay. Buyers can also explore installment payments through Afterpay, Klarna, or Affirm, including advertised interest-free options. I appreciate having different ways to pay, although installment availability and terms depend on the provider.
30-Day Money-Back Guarantee and Support
ThePhotoStick Omni X includes an advertised 30-day money-back guarantee for customers who aren’t satisfied with their purchase. The company also highlights human customer support, a quality promise, and its location in Haxtun, Colorado, USA. These are reassuring features, but I recommend checking the complete return conditions before ordering.
Overall, I think ThePhotoStick Omni X offers appealing value for buyers who want simple, guided photo backups. The 128GB package would be my preferred balance of price and capacity, while the 256GB option provides more room for larger collections. Just confirm the final checkout price, shipping details, and available discounts before purchasing.
Where to Buy ThePhotoStick Omni X
You can buy ThePhotoStick Omni X through its authorized online promotional offer page, where all four storage capacities are listed. The ordering process is simple, and you can choose your preferred storage size, review available discounts, and select a payment method. I recommend checking the shipping details and final price before completing your purchase.

How to Order ThePhotoStick Omni X Online
- Visit the authorized website: Go to the authorized ThePhotoStick Omni X website to view the available storage options and promotional offers.
- Choose your storage capacity: Select from 32GB, 64GB, 128GB, or 256GB based on how many photos and videos you want to back up.
- Select your quantity: Choose how many devices you want to purchase. Check the available discounts if you’re ordering additional units.
- Review shipping and pricing: Confirm your selected package, promotional price, shipping eligibility, and any additional charges before proceeding.
- Enter your shipping information: Provide your name, delivery address, and contact details accurately to help avoid delivery problems.
- Choose your payment method: Select an available option, such as Visa, Mastercard, PayPal, or Google Pay. Installment options may also be available for eligible buyers.
- Complete your order: Review the final amount and order details, then confirm your purchase. Keep the order confirmation for future reference.
I recommend ordering through the authorized offer page so you can review the available promotions and purchase conditions in one place. The sales page also advertises a 30-day money-back guarantee, which is worth reviewing before checkout. Choose the storage capacity that fits your needs rather than purchasing a larger version simply because it carries a promotional label.
Frequently Asked Questions About ThePhotoStick Omni X
Still have questions about ThePhotoStick Omni X? Beyond its features and pricing, there are a few practical details worth understanding before using it. Here are answers to common questions about photo transfers, backup problems, file safety, and everyday use.
Does ThePhotoStick Omni X Work on Multiple Phones?
Yes, ThePhotoStick Omni X can be used with multiple compatible phones and computers. You can connect it to different devices and back up supported files as long as enough storage space remains. I recommend organizing the saved files carefully when several family members share one drive.
How Often Should You Back Up Photos With ThePhotoStick Omni X?
You can use ThePhotoStick Omni X whenever you have new photos or videos to save. For most people, a weekly or monthly backup routine is a practical starting point, depending on how frequently they take pictures. I recommend backing up important memories soon after special events rather than waiting until your phone runs out of storage.
Why Is My ThePhotoStick Omni X Not Showing Up on My Phone?
ThePhotoStick Omni X may not appear if the connection is loose, the required permissions are missing, or the phone doesn’t support the storage connection. Try reconnecting the device, reopening the companion app, and checking your phone’s file-access settings. Also make sure you’ve selected the correct USB storage location.
Does ThePhotoStick Omni X Back Up iCloud and Google Photos?
ThePhotoStick Omni X can save supported photos and videos that its software can access. Pictures stored only in iCloud or Google Photos may need to be downloaded to your phone or computer before backup. I recommend checking that the full-resolution files are available locally before starting.
How Do You Transfer Photos From an Old Phone to a New Phone Using Omni X?
First, connect ThePhotoStick Omni X to your old phone and back up the photos you want to keep. Then connect the drive to your compatible new phone and use the available file-management options to access or copy the saved pictures. Keep in mind that transferring photos doesn’t automatically restore your old phone’s apps or settings.
What Happens When ThePhotoStick Omni X Storage Is Full?
When ThePhotoStick Omni X runs out of available storage, it cannot save additional files until you free up space. You can transfer existing backups to another storage device or remove files you no longer need. I recommend keeping another copy of important photos before deleting anything from the drive.
Will ThePhotoStick Omni X Keep My Original Photo Quality?
Copying an original photo file normally preserves its image quality without intentionally compressing it. However, the handling of timestamps, metadata, and photo organization can depend on the backup software and file format. I recommend checking a few backed-up images against their originals to confirm everything was preserved as expected.
Does ThePhotoStick Omni X Save WhatsApp Photos and Videos?
ThePhotoStick Omni X may back up WhatsApp photos and videos when those files are saved in locations accessible to its companion software. Media stored inside restricted application folders may require additional steps. It shouldn’t be considered a complete WhatsApp chat backup or restoration tool.
Are Photos Stored on ThePhotoStick Omni X Private and Secure?
ThePhotoStick Omni X stores backup files on a physical drive rather than requiring cloud storage for ordinary transfers. However, local storage doesn’t automatically mean the files are encrypted or password-protected. I recommend keeping the drive somewhere secure and using a verified encryption method when storing sensitive files.
What Should I Do If ThePhotoStick Omni X Stops Working During Backup?
If a backup stops unexpectedly, check the USB connection, available storage space, and application permissions. Reopen the companion software and check which files were saved before attempting the backup again. Avoid formatting the drive or deleting existing backups while troubleshooting, particularly when those files are important.
My Final Thoughts on ThePhotoStick Omni X
After looking at everything ThePhotoStick Omni X offers, I think it’s a worthwhile choice for anyone who wants a simpler way to protect their photos and videos. What I like most is how it combines automatic file scanning, easy-to-use software, and multiple connectors in one portable device. It makes managing personal backups feel less complicated, especially for people who aren’t comfortable transferring files manually.
For me, convenience is what makes this device stand out. Throughout my ThePhotoStick Omni X review, I’ve focused on its practical features, ease of use, and overall value. While a regular USB drive may cost less, I think Omni X’s guided backup process gives it a meaningful advantage for everyday users.
Would I recommend ThePhotoStick Omni X? Yes, especially for families, beginners, and anyone managing photos across multiple devices. I’d choose a storage capacity that fits my needs and keep another copy of my most important files for extra protection. If you’re tired of dealing with a crowded photo library, Omni X is definitely worth considering.
ThePhotoStick Omni X is a portable storage device designed to back up photos, videos, and other supported files from compatible phones and computers. It combines physical storage with software that helps identify and copy files without requiring users to find everything manually. Its main purpose is to make personal file backups easier to manage.
- Four connector types support a broader range of compatible devices.
- Supports common photo, video, and additional file formats.
- Duplicate handling can reduce unnecessary repeat copies.
- Generally more expensive than basic USB storage.


